Showing posts with label Sewing. Show all posts

Thursday, February 26, 2015

DIY Skirt from PJ Pants

On Sunday, when we were having my father-in-law's funeral/burial, the weather was pretty ugly: rainy, wet, chilly. I decided I wanted to wear these boots to keep my legs and feet warm and dry for stomping around at the cemetery.


I was originally wearing a basic knee-length black skirt, but when I put the boots on I thought, "These look like Scottish boots to me. I wish I had a tartan/plaid skirt to wear with them."

I had a turquoise skirt that was a little longer and maybe in a vague way resembled a kilt-like skirt with the two darts at the waist. I wore a dark brown, suede-type material long-sleeve shirt with it.
I guess it looked okay, no one told me I looked cute.
(When people tell me I look cute, they're really saying I look worse than usual, but they're too nice to actually say I look worse than usual, so they say I look cute. Trust me, I never look cute on my best day.)

Anyhoo. Couple days later, J brought in the bags of his Dad's clothes and personal items from the nursing home/hospital to go through and decide what to do with it all.
I was washing the clothes to be donated to a thrift store.

When lo and behold, what fell into my hands: (A pair of red plaid men's lounge pants)


I thought to myself, "I wonder if/I bet you can, make a skirt from pants," so I searched the internet to see if/how hard such a thing would be to do.

*Please note - this isn't a tutorial because I pretty much had no clue what I was doing. If you want to turn a pair of pants into a skirt, Search the 'net and find a site of someone who knows what they're doing.

I looked at some photos of it (I tried to read some How to's, but I'm not a sew'er so I don't understand a lot of the instructions and then I just get lost....) anyway I managed to get an idea of what I thought I might could try.

First, I cut the legs off.


Then I used my seam-ripper to rip open the legs seams. (Mostly. I don't really have the patience for that, so I just ripped some of the longer ones apart.)


I forgot to take a picture after this, but I turned the opened legs upside down, so the narrow'er ends were at the top.

They measured approx. 18" across, for a total of 36" around at the butt/top of the thighs.


I laid the legs together with wrong sides facing out and sewed the seams up to make the skirt part.

I turned the top part inside out and sewed new seams, taking a couple inches off each side, so the top part was (approx.) the same width, 18-inches across, as the legs/skirt part.


I turned both parts inside out and pinned the edges together, intending to sew them together that way, but when I turned it back right side out to check it, that didn't look right.

I ended up hemming the top part, then sewing it to the bottom/legs/skirt part.


I cut the bottom off the skirt straight(ish) and hemmed it,


And, to my amazement, I had made a skirt,


Here's the thing.
I love the bottom part of the skirt. It's swingy.

I would like you show you the top part, that should have gone around my butt/hips, but no.
Let's put it this way: after sewing, the butt/thighs part came out approx. 35" around, and turns out my big 'ol butt is more like 40".

Arrrrrgggghhhhh!!!

Monday, August 26, 2013

Camper Work & Dalmatian Stocking

This weekend was the first nice weekend we've had in quite awhile. Read: dry. We can certainly safely say we are definitely out of our past few-year drought now.

Anyway, it wasn't extremely hot, and mostly the humidity was low....er than usual. I decided it felt like a good time to start working on our camper.

When I bought it I knew it had roof damage (yes, I know, bad, bad. But it was the perfect size, the right price, and I was in a hurry).  The damage had been patched, but there was still leakage. We sealed it with Kool-Seal and it worked for awhile but I guess couldn't stand the trauma of a 2,000+ mile Road Trip.


Ah-ha. that looks like the culprit. Either that or the seam connecting the roof and back wall. Either way, we'll fix both and hope that solves the problem.


The good news is the damage isn't as extensive as I had been afraid it would be.
The one board across the top there - along the seam, which is why I questioned the seam as being the problem - is rotted completely and needs replacing, but the lower boards (lower left of photo) are in good shape. Meaning it's not rotted all the way to the floor and doesn't need a total tear-apart, re-build.

Looks like - after we repair the gash and caulk/seal the seam - all we have to do is replace some sections of wood in that corner, plus the overhead board, insulate, and re-cover.  Luckily there are still several sheets of that same old pecan wood paneling on the carport.


For today's project, I made a Dalmatian stocking.

I had gotten a piece of Dalmatian print fleece in all that free material I got from Freecycle a couple weeks ago, but didn't know what I could do with it. It wasn't large enough for a blanket, maybe big enough for a small costume, but I didn't need a small Dalmatian costume and anyway I can't sew one even if I did.

Eventually I decided I could make Christmas stockings out of it.

I went up in the attic and found one of the boy's Christmas stockings to use as pattern.


I used the same technique as the pajama pants the other night, outlining it on Kraft paper to make a pattern.
I left the top part longer for a cuff. I cut two of the stocking shape and sewed them together.


Somehow, when I pictured the cuff in my mind, if I sewed the seam all the way out, when I turned the cuff down, it would be right.  Of course it wasn't right, though, because the seams were on the inside, but now were on the outside.


So I cut the cuff off and turned the stocking inside out and put the cuff inside and sewed around, only to end up with the seam now around the top of the stocking. What the heck?


Oh, and I realized I had sewed the hanging loop on the wrong side. Derp.


Somehow I finally got the thing figured out.


Hopefully the next one I can figure out the correct way to sew the cuff where I can just fold it down, without having to cut it off.

Now I just need some idea(s) about making it more Fire Department-y.

Friday, August 23, 2013

Sewing Pajama Pants

First of all you should know, I'm not a very good seamstress. My edges never match, my threads aren't tight or uniform. Like everything else I attempt, I am just short of mediocre.

But, that doesn't seem to stop me from trying.

So I saw this idea for making pajama pants that looked pretty easy.  The instructions were for kids size pj pants, but my kids are adults and don't wear pj pants, but I do, and I wanted some for myself, so I used a pair of my jeans that are comfortable and I like to make the pattern using Kraft paper.


Closer up you can see my (feeble) attempt at outlining the jeans. I still apparently didn't leave enough space, or else I sewed the seam too tight.


I picked out a nice pink with flowers and and some shiny I can't describe from the piles of free fabric and material I scored from Freecycle last month.


Closer up view of the fabric.


I ironed and pinned my pattern on the fold of my material and cut out two (sides).

With right sides together, I sewed the (top sides). See the original instructions for a better explanation.


Then I turned the pants sideways, or opened them up, and with right sides still together, sewed the inseam all the way around.


I sewed an elastic channel and fed/pulled the piece of elastic through with a large safety pin. I (half-ass attempted because my sewing machine wouldn't cooperate) sewed the ends of the elastic together, then sewed the remainder of the channel closed.


Then I hemmed around the leg bottoms.

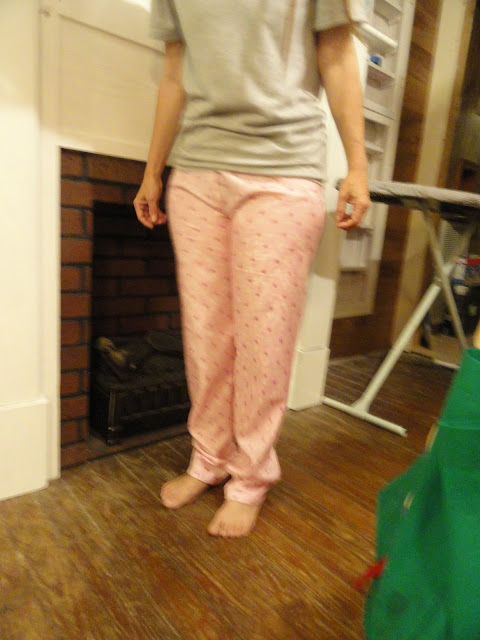
They fit - once I got them past my huge thighs and arse. Not exactly figure flattering, but that's likely more my figure than the pants.


I think the next pair I try, I'll outline the jeans with more space, and also forego the elastic and sew a knotted-ends-fabric-string that I can tie instead.


Anyway, they really were easy. I didn't know sewing a pair of pants could be so easy.

Thursday, June 14, 2012

Oh.Kay.

Prior to my last post, I was impatient to get on with my project. I didn't want to practice any more, I didn't want to waste what little fusing webbing I had on practicing.
But more than that, I didn't want to mess up my project, so I had no choice.

I dug out a few generic, worn old t-shirts I'd culled from one of the boys' t-shirt supply and cut, ironed, and sewed.

I didn't do toooo badly, for a first try, I guess. Some of the seams didn't match up, and I didn't pay attention to the direction of the print of the camo panel.

(Wow, that is ugly!)
Next I thought I'd try fixing a back on it, as practice. I still didn't want to cut up my flannel sheet, so I went looking for some or a piece of material big enough.
I didn't have any big enough, but I have a box of material my Mom gave me, that belonged to my Grannie (who passed away in 1994).

Grannie could sew, beautifully. Both Grannie's could. So can my Mom and my Sister. If my sister can sew, I dang well should be able to as well, or better.
Especially now. Used to there was all kinds of things I couldn't do, that I could do when I got older, like make biscuits, keep flowers/plants alive, raise a garden, can stuff from the garden, make jelly. Therefore, I should be able to sew now, too.

Anyway, I got the box out to start looking though the materials....and 18 years later, it still smells like Grannie.  I couldn't even look at the material because I kept holding it to my face and inhaling.


Also in the box was some cloth napkins/hankies she'd made, or was working on.


I'd like to use those cloth napkins with the antique dining room suit she gave me, but I don't want to wash her scent out of them.

The hankie and the flower-embroidered-what-ever-it-is are a delicate material with perfect, straight, tiny stitches. So lovely.

Anyway, I was getting no where, so I just folded it all back up and stuck it back in the box.

Some times I'm more creative than other times....apparently this isn't one of those times. I give up. Maybe next week.

I think I'll go back to my getting-rid-of-stuff project for the time being.
Except, tomorrow I'm going thrifting.

Panic Mode

Awhile back, Mariah @ Thee Fire Wife posted a T-shirt quilt/blanket quilt-along. Like many people - and it won't surprise you at all to know - t-shirts are another thing I hoard for sentimental reasons.
(Kinda strange to realize I'm such a "sentimental hoarder", when I never really considered myself to be a very sentimental person.)

Anyway, one of the first requirements was a flannel sheet. Which until a couple of days ago I didn't have, couldn't find one cheap, or not in a set.

Next requirement (maybe optional for some, but definitely not me) was a sewing machine.
I unearthed my machine from upstairs and dusted it off/out. Then I remembered the last time I tried using it, it had a problem with the bobbin thread tangling/jamming/breaking.
I found up some scrap material and gave it a go to see if maybe it had fixed itself over the years. Of course not. So I google'd, and located a Brother manual online, messed with it, and finally got it working right.

It's been a looooong time since I sewed anything...tried to sew...I never was very good at it to start with...So I knew I couldn't jump right in. I needed to try it out and practice.

Mariah's instructions were to cut, pin, and sew a square of t-shirt to a square of the flannel sheet. I used a nasty, ragged old T headed for the rag bin, and a scrap of regular material (not ready to cut up my flannel sheet yet). I cut, pinned, and sewed...and it did not go well.


I had read on some other sites that they used the fusible web backing on the t-shirt instead, making it stiffer, square-r and easier to sew to the other t-shirts.
I had some fusible web backing in my craft stash, so I cut out a square, ironed it on, and sewed it the first panel. It was a lot easier to sew, although my seam still didn't come out that spectacular.


Then I decided, okay, well I know I can make the panels, so I'll work on that. I sorted through the t-shirts I want to use for the blanket, and then picked the least important one, one I didn't really care if I messed it up.

I also decided that using an entire square of fusible backing was a waste, when all I really needed was to line the edges to sew the seams. So I cut strips of fusing and ironed them on around the edges.


This shirt had a front and a back, so I got a two-for-one out of it. 


The problem was when I went to cut up the other t-shirts. The more important ones. Panic set in.
What if I'm doing it wrong? What if the little strips of fusing doesn't work as well? What if I mess it up? What if? What if?

So, I'm stuck. I can't bring myself to cut up the other shirts.